Salesforce Testing: How Provar Simplifies API Validation
Salesforce’s powerful APIs are the backbone of custom development, automation, and integration across its cloud-based platform. Whether you’re building custom workflows or connecting Salesforce to external systems, reliable API testing is essential for delivering high-performing, stable applications.
Provar, a powerful test automation tool purpose-built specifically for Salesforce, facilitates API testing with native support for Salesforce integrations. Provar can be used by teams to test REST and SOAP API’s, validate workflows, and ensure that backend operations satisfy business requirements. Provar integrates API and UI tests into a single test case, allowing testers to efficiently validate complete end-to-end scenarios and empowering teams to test smarter, faster, and with greater confidence.
Provar offers several key advantages that simplify and strengthen your API testing strategy, including:
- Seamless integration with Salesforce REST and SOAP APIs.
- Built-in support for SOQL queries to perform direct database validations.
- User-friendly drag-and-drop interface for creating API test steps.
- Data-driven testing with parameterization and reusable components.
- Detailed execution reports with advanced debugging tools.
1. Download Provar: Install Provar on your local computer after downloading it from the official website.
2. Set Up Salesforce Connection:
- Launch Provar Desktop, then go to Test Settings > Connections.
- Enter your login credentials and security token to create a new Salesforce connection.
- Select the proper Salesforce environment, such as Sandbox or Production.

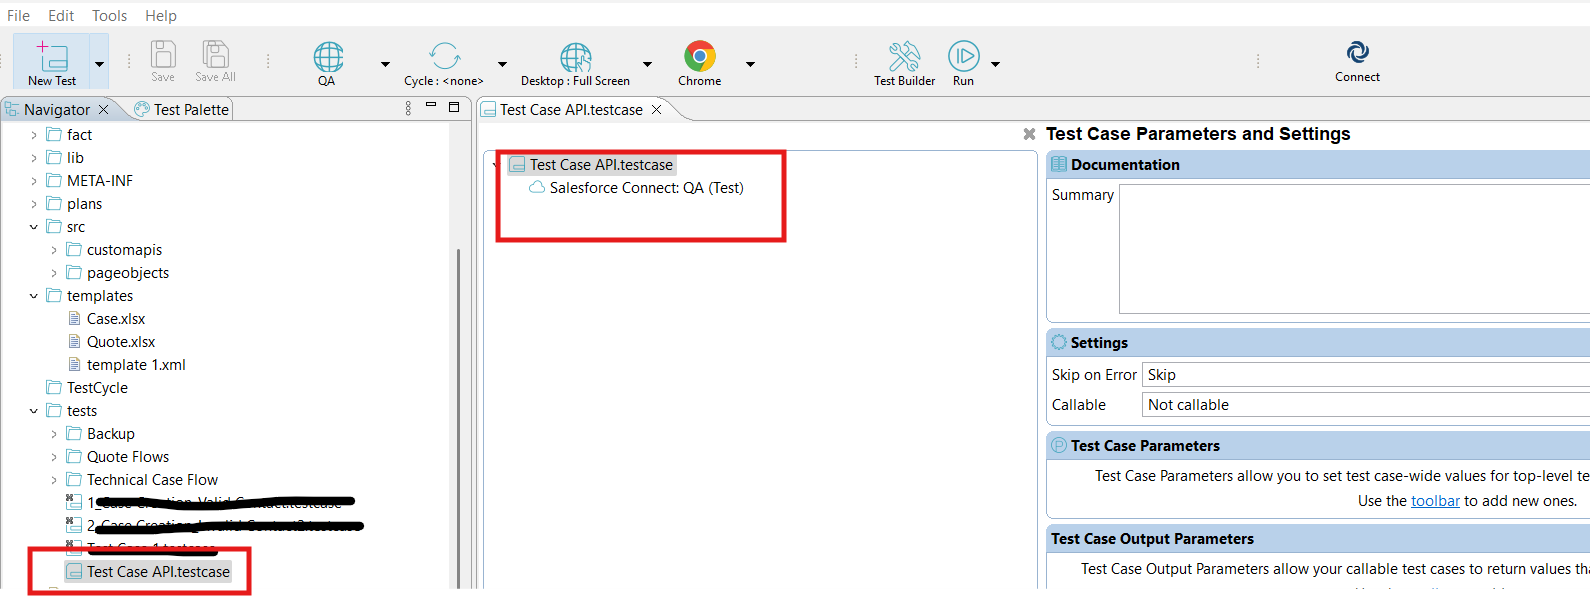
1.) Open Provar Desktop, then select File > New > Test Case.
2.) Give your test case a meaningful name, such as "Account API Test."
3.) Click Finish after choosing the folder in which the test case will be stored.
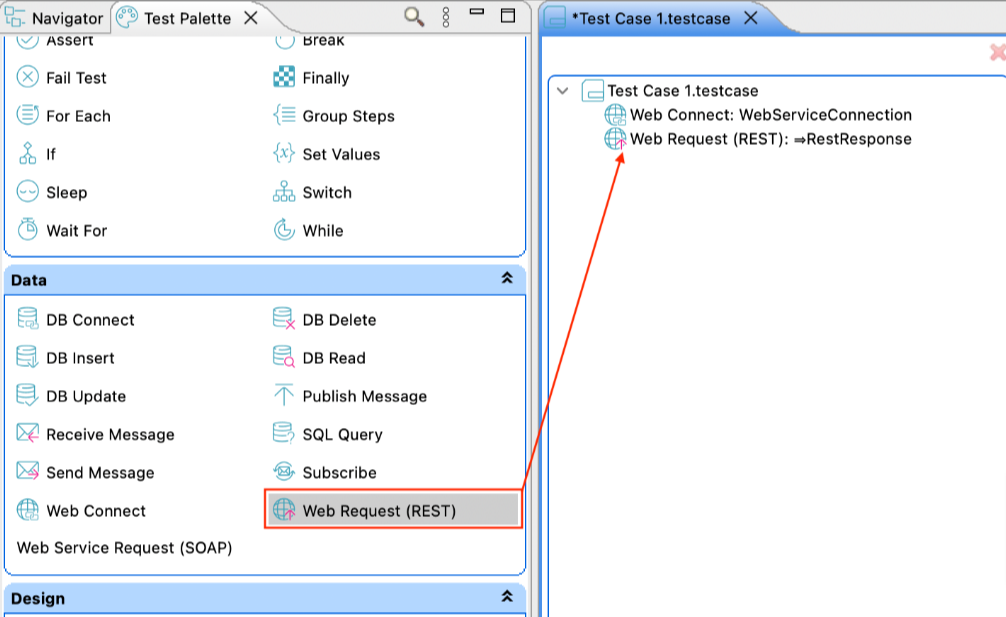
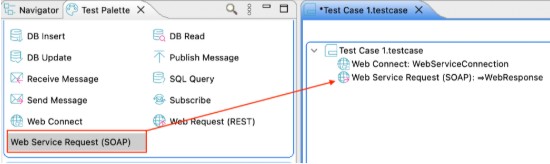
1.) Add an API Call
- Click Add Test Step > API Call after opening the test case in Test Builder.
- Depending on your needs, select between REST and SOAP APIs.
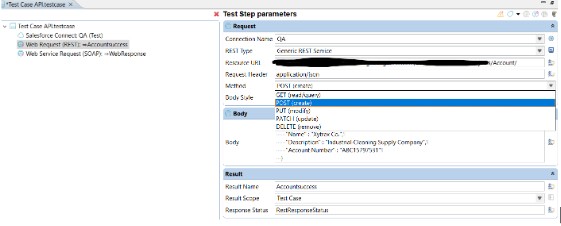
2.) Configure REST API
- Enter the Endpoint URL (e.g., https://yourinstance.salesforce.com/services/data/vXX.X/sobjects/Account).
- Select the HTTP method (GET, POST, PUT, DELETE).
- Add authentication headers. Typically, this includes:
- Authorization: Bearer <access_token>
- For POST/PUT requests, supply the input payload in JSON format.
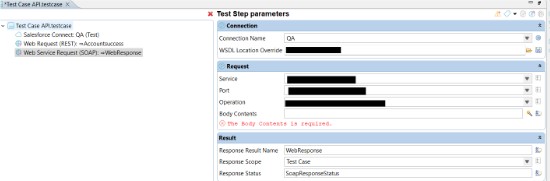
3.) Configure SOAP API
- Upload the SOAP service's WSDL file.
- After choosing the SOAP action, map the input parameters to the test variables.
1.) Add Assertions for API Response
Add a Response Assertion Step to validate:
- HTTP Status Code (e.g., 200 for success).
- Specific fields in the JSON/XML response using JSONPath or XPath.
Example Assertion:
- JSONPath: $['id'] to validate the record ID returned by the API.
- Status Code: Verify HTTP code is 200.
2.) Database Validation with SOQL
i. To directly validate data in Salesforce, add a SOQL Query Step.
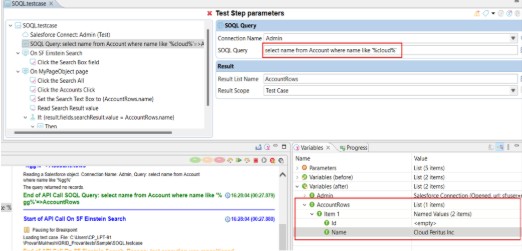
ii. Declare that the returned data is consistent with the anticipated values.
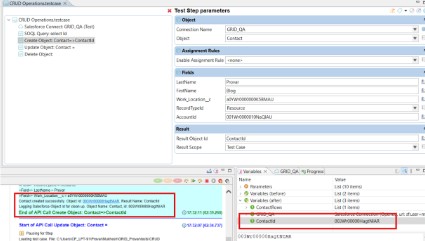
Create:
You can create records by using the Create test step. Drag and drop a row into the test case from the organization browser, then choose "Add an Object" to create a step in order to use this API.
In the test step, select the fields you wish to fill in. Please be aware that the necessary fields will be chosen for you automatically.
Click "OK" after making your selections. The next test step will be generated automatically as a result.
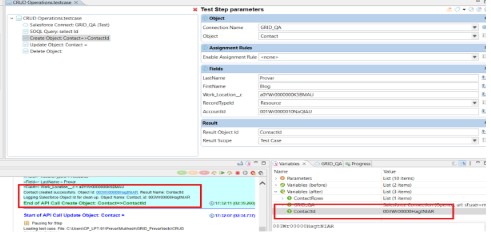
After adding a test step, you can add or remove fields by clicking the icon at the top of the Test Step parameters.
When this test step is finished, a new record will be created, and the record ID will be saved in the variable specified in the Result Object ID.
Update:
You can change record information at the API level using the Update test step. Drag a row into the test case from the org browser, then choose Add an Object Update Step to utilize this feature. Make sure the object you wish to update is in the same row as the one you have selected in the org browser.
The fields to be filled in during the test step should then be specified. There will be clear indications of required fields. Make sure the record to be updated is correctly identified by the Object Id. It will typically be pre-populated according to the data row that was chosen from the org browser. It is advised to swap it out for a variable that holds the record's ID instead. To find and choose the relevant variable, use Content Assist (CTRL + spacebar).
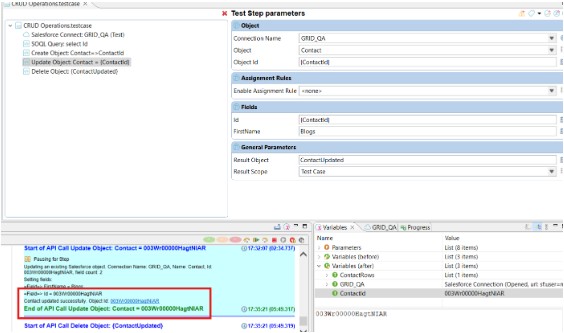
Note: This test step cannot be completed without an Object Id. The Fields section contains a list of the fields that need to be updated.
Once the test step has been added, click the Edit icon at the top of the Test Step parameters to change the fields.
Delete:
At the API level, a record is deleted in the Delete test step. Drag a row of data into the test case from the org browser, then choose Add an Object Delete Step to utilize this feature. Make sure the row you have chosen in the org browser matches the item you want to remove. (e.g., an Opportunity).

i. Testing External Integrations
Verify that third-party apps that are integrated with Salesforce APIs operate without a hitch.
Ex: Integration with Gmail


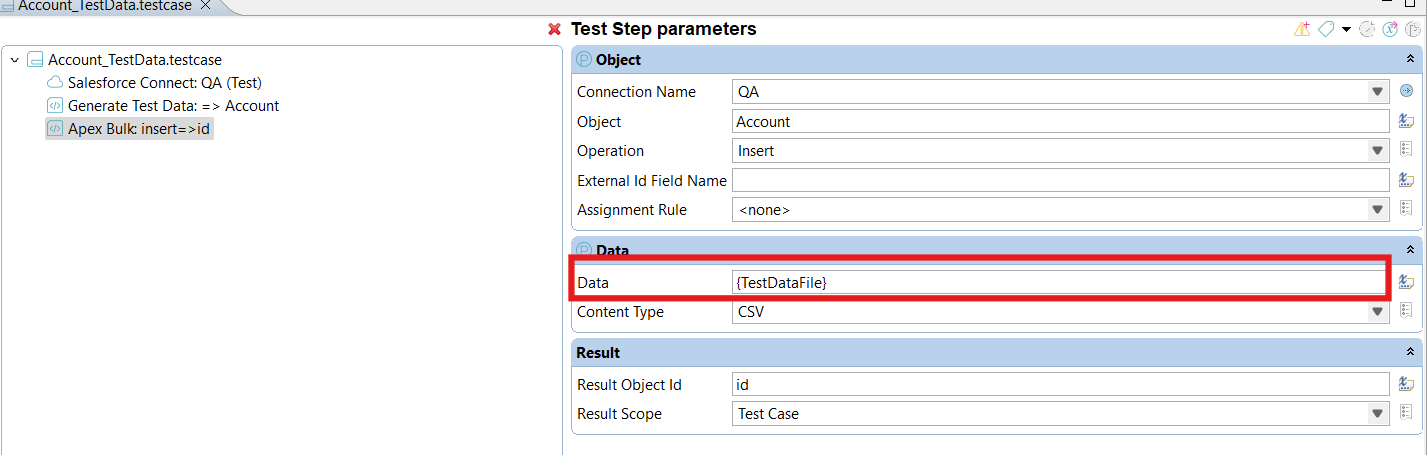
ii. Bulk API Operations
Perform batch operations such as importing large datasets into Salesforce.

- Understand Salesforce Object Relationships:To write useful test cases, become familiar with the connections between Salesforce objects (such as Account, Contact, and Opportunity).
- Focus on Security: To make sure data is accessed securely, test APIs with various user profiles and roles.
- Handle Limits and Throttling: To verify API behavior under rate limits, model high usage scenarios.
- Leverage SOQL and SOSL: Use Salesforce’s query languages to validate data retrieval APIs.
- Test Business Rules: Make sure APIs follow Salesforce validation rules, workflows, and triggers.
- Log and Analyze: Use Provar’s logs to debug issues and identify patterns.
- Integrate with CI/CD Pipelines: Automate API tests to run as part of your DevOps pipeline.
With Provar’s purpose-built features and seamless Salesforce integration, testing your APIs becomes faster, easier, and more reliable. Whether you’re validating CRUD operations, testing bulk APIs, or ensuring critical business rules are enforced, Provar can help your team do it all — without the complexity.
Ready to start automating your Salesforce API tests? Reach out to us at info@cloudperitus.com and book a demo to see how we can help elevate your integration quality.
Cloud Peritus has been at the forefront of innovation since its inception and has since played an integral role in delivering game changing solutions to its clients time and again, resulting in 5 star reviews from across the board.
Feel free to check us out at Salesforce AppExchange.
If you found this interesting, check our other articles on the topic of QA and AI in Salesforce Testing.